
The first step is to spray a layer of primer over the surface I wish to paint. Some people don't see the need for primer as long as you're using spray paint meant for plastics. But I read priming helps to prevent the original colour of the surface you are painting from showing through.
Preparing to prime:
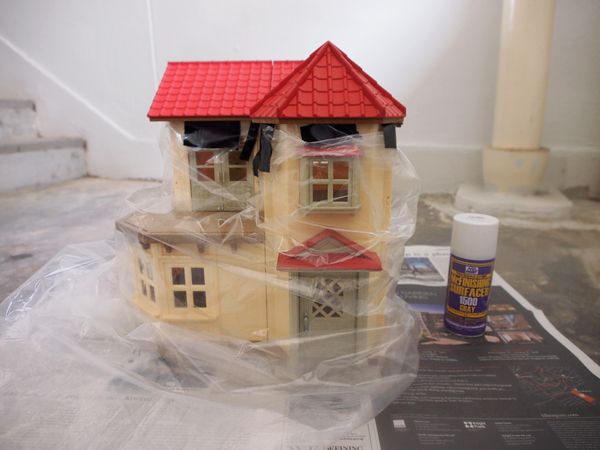
I used Mr Hobby Surfacer 1500 Gray spray to prime the roof. I taped the areas I didn't want sprayed with masking tape first. I also used a huge piece of plastic to seal the windows so paint wouldn't get inside.
Remember to shake the can well before you start and always use a dust mask. It's also best to do this outside where it's well ventilated. Paint fumes are toxic and can make you ill.
Result:
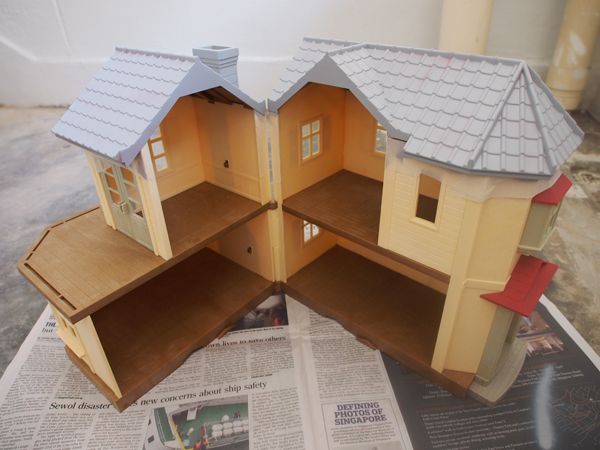
Pretty proud of how even it looks considering this is the first time I'm spraying something that isn't for practice. Spray cans are really easy to use once you get the hang of it, though I did make a couple of small mistakes:
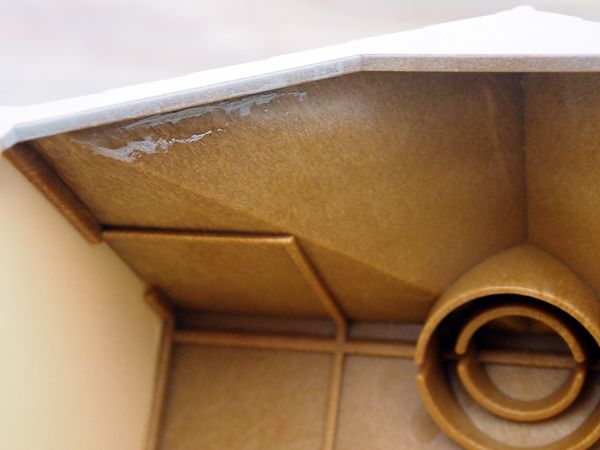
Got some primer on the inside of the house because I was lazy and didn't tape the inside.
I've yet to decide if I want to paint the ceiling a different colour. If I do, I'll have to prime the whole ceiling anyway. But if I decide to keep the ceiling as it is, I think some rubbing alcohol should remove it. Be careful not to use nail polish remover with acetone in it as it might melt away the plastic.
I also had these bubbles / bumps on one part of the roof:
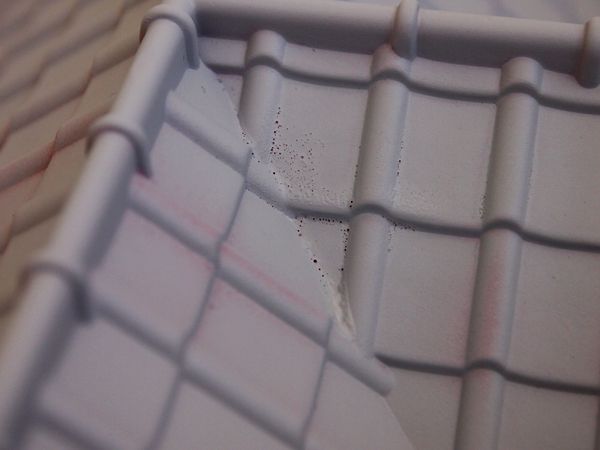
This happens when you spray too close and the paint gets too thick; making it hard to dry evenly. But this can easily be fixed with some sanding when the layer has completely dried. It's important to fix bumps before adding more layers of paint because spraying on an uneven surface will only make it look worst.
That's it for now. Can't wait for my next day off to start painting the roof brown!
It's fascinating to watch your colouring process :). I think it turned out really good - I'm still afraid of colouring the original houses :D. Can't wait to see the brown version of the roof! Good luck with it!
ReplyDeleteWow! I didn't realise what a difference the roof colour would make, can't wait to see the finished product!
ReplyDeleteemily
Thanks for sharing your wisdom with us. I can't wait to see the next phase of your project! xo Jennifer
ReplyDeleteThank you all for the kind comments ^^ It means so much to receive so much support from you guys especially since this is my first attempt at painting and customizing
ReplyDeleteWOW! This looks really really great! I'm eager to see you do the rest! I'm honestly not the the biggest fan of the original colors on this house, so I just love seeing a transformation like this! :D
ReplyDeleteThank you Paige ^^ I hope the transformation does not disappoint you ><
Delete